목차

기본 Templates 구성하기
이번에는 기존에 가져온 무료 Bootstrap(부트스트랩) Templates에 댓글(Comment)창을 추가하려고 합니다. 기본 Templates 구조는 블로그 형태 입니다. 무료 Templates를 가져와서 사용하는 방법은 아래 링크를 참조 하시면 됩니다.
https://scribblinganything.tistory.com/404
[Bootstrap] Templates 무료 예제로 Flask와 연동하기
목차 Templates 무료 예제 다운(Download) 받기 우선 Bootstrap으로 만든 HTML 무료 예제를 다운 받습니다. 이번 예제에 사용할 Template는 아래 링크에서 가져 왔습니다. https://startbootstrap.com/template/s..
scribblinganything.tistory.com
다음으로 가져오려고 하는 댓글쓰기 디자인은 아래 그림과 같습니다.

해당 댓글 디자인도 무료로 아래 링크에서 소스 코드를 가져올 수 있습니다.
Blog Post - Free Bootstrap 5 Blog Starter Template - Start Bootstrap
기본 Templates 에 댓글창 추가하기(HTML)
기존 Templates의 파일명은 index.html입니다. 해당 파일을 열어 보시면 아래와 같이 page 컨텐트에 대한 내용이 있고 div 클래스가 끝나는 영역까지가 페이지 내용입니다. 댓글은 그 하단에 추가할 것입니다.
<!-- Page content-->
<div class="container-fluid">
컨텐트 내용...
</div>
앞서 댓글 무료 템플릿에서 댓글창에 해당하는 HTML 문서 부분을 복사해서 기본 Template에 추가 합니다. 댓글창 부분의 코드는 아래와 같습니다.
Comment 부분 코드>>
<section class="mb-5">
    <div class="card bg-light">
        <div class="card-body">
            <!-- Comment form-->
            <form class="mb-4"><textarea class="form-control" rows="3" placeholder="Join the discussion and leave a comment!"></textarea></form>
            <!-- Comment with nested comments-->
            <div class="d-flex mb-4">
                <!-- Parent comment-->
                <div class="flex-shrink-0"><img class="rounded-circle" src="https://dummyimage.com/50x50/ced4da/6c757d.jpg" alt="..."></div>
                <div class="ms-3">
                    <div class="fw-bold">Commenter Name</div>
                    If you're going to lead a space frontier, it has to be government; it'll never be private enterprise. Because the space frontier is dangerous, and it's expensive, and it has unquantified risks.
                    <!-- Child comment 1-->
                    <div class="d-flex mt-4">
                        <div class="flex-shrink-0"><img class="rounded-circle" src="https://dummyimage.com/50x50/ced4da/6c757d.jpg" alt="..."></div>
                        <div class="ms-3">
                            <div class="fw-bold">Commenter Name</div>
                            And under those conditions, you cannot establish a capital-market evaluation of that enterprise. You can't get investors.
                        </div>
                    </div>
                    <!-- Child comment 2-->
                    <div class="d-flex mt-4">
                        <div class="flex-shrink-0"><img class="rounded-circle" src="https://dummyimage.com/50x50/ced4da/6c757d.jpg" alt="..."></div>
                        <div class="ms-3">
                            <div class="fw-bold">Commenter Name</div>
                            When you put money directly to a problem, it makes a good headline.
                        </div>
                    </div>
                </div>
            </div>
            <!-- Single comment-->
            <div class="d-flex">
                <div class="flex-shrink-0"><img class="rounded-circle" src="https://dummyimage.com/50x50/ced4da/6c757d.jpg" alt="..."></div>
                <div class="ms-3">
                    <div class="fw-bold">Commenter Name</div>
                    When I look at the universe and all the ways the universe wants to kill us, I find it hard to reconcile that with statements of beneficence.
                </div>
            </div>
        </div>
    </div>
</section>
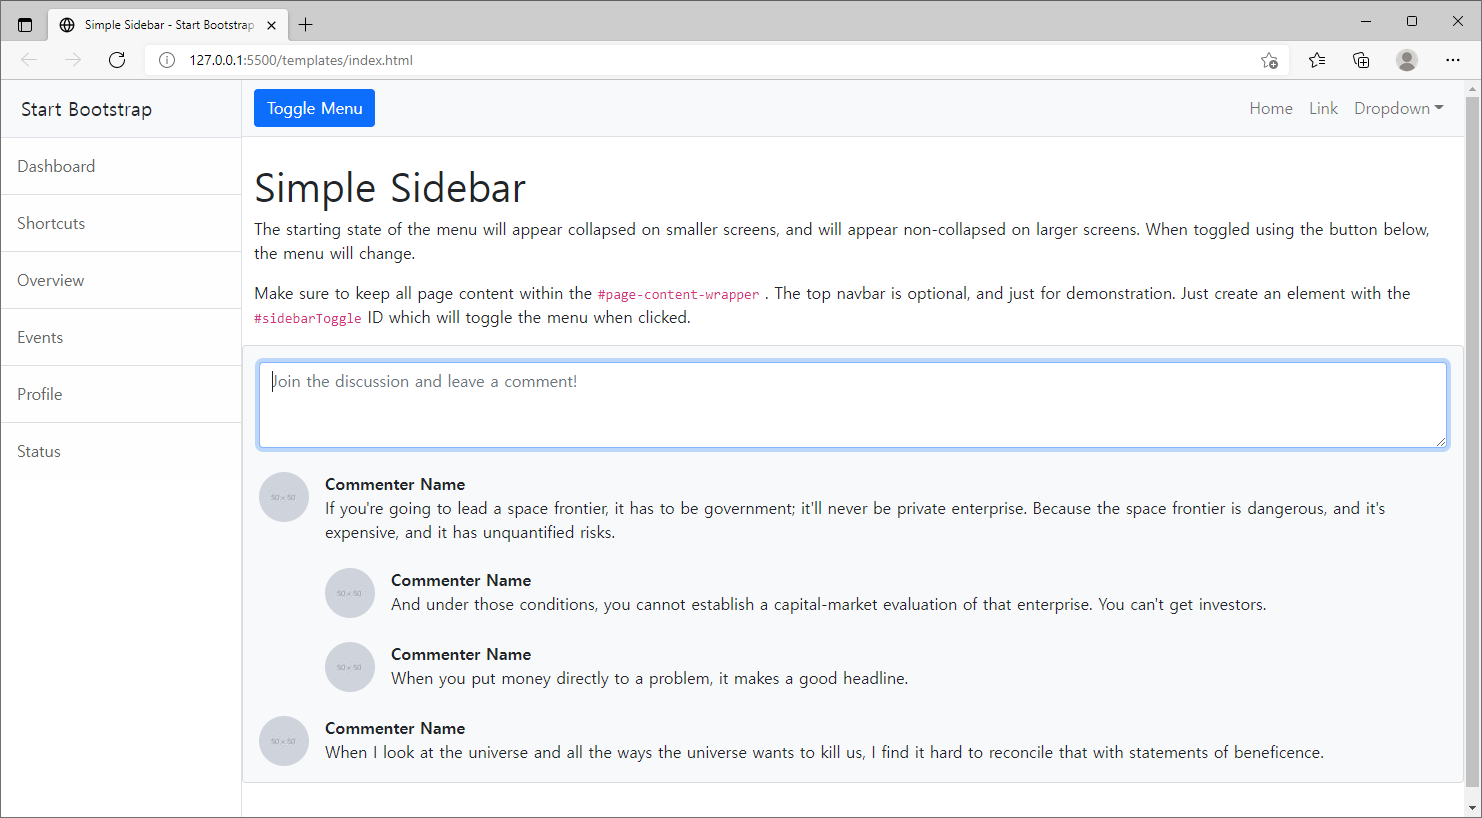
추가한 내용을 확인 결과 아래와 같이 나옵니다.
결과화면>>

'웹관련프로그래밍(web programming) > Bootstrap(부트스트랩)' 카테고리의 다른 글
| [Bootstrap]리스트 태그, 리스트 표시 없애기, css와 비교 예제(ol, ul, li) (0) | 2023.07.10 |
|---|---|
| [Bootstrap]화면 사이즈에 따른 크기 동적 조절(Browser size, width=device-width, @media) (0) | 2023.06.28 |
| [Bootstrap] Templates 무료 예제로 Flask와 연동하기 (2) | 2021.12.03 |
| [Bootstrap]HTML 버튼,라벨,입력창 오른쪽 정렬/배치, 위, 아래 놓기 (0) | 2021.11.05 |
| HTML - Bootstrap 사용해서 공간(레이아웃) 배치하기 (Grid) (0) | 2021.10.13 |