목차

이번 포스트는 파이썬을 사용해서 사용자가 원하는 주기로 컴퓨터 화면을 캡쳐하는 프로그램을 만들어 보겠습니다. 그리고 화면 캡처를 진행하는 동안 컴퓨터를 자유롭게 동작하기 위해 프로그램이 백그라운드로 돌아 갈 수 있게 쓰레딩(Threading, 스레드)를 사용해보겠습니다.
소스 코드는 마지막에 다운로드 할 수 있습니다.
[Python] 컴퓨터 화면 설정한 시간 별로 캡쳐하기 #1
예제 코드>>
from PIL import ImageGrab

pic_cnt = 0
def screen_capture():
    img = ImageGrab.grab()
    img.save("image_{}.png".format(pic_cnt))

screen_capture()
결과>>

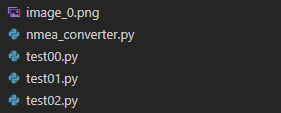
프로그램을 실행 시킨 폴더에 위와 같이 image_0.png 로 파일이 형성되었습니다.
코드 주석>>
from PIL import ImageGrabPIL 은 이미지 캡쳐를 위한 라이브러리로 설치 시 PIL로 설치하면 안되고 "pip install pillow"로 설치 하셔야 합니다. 그렇지 않으면 "No module named" 에러 메세지가 뜹니다.
    img = ImageGrab.grab()
    img.save("image_{}.png".format(pic_cnt))
현재 화면은 ImageGrab.grab 으로 잡아서 save로 저장해줍니다. 파일명에 경로명을 넣어주면 원하는 경로에 파일을 만들어 줍니다.
[Python] 컴퓨터 화면 설정한 시간 별로 캡쳐하기 #2
이번에는 원하는 시간과 기간동안 캡처를 하도록 설정하겠습니다.
예제 코드>>
from PIL import ImageGrab
import time

period = 3 #주기값 입력
duration = 15 #촬영 시간

def screen_capture():
    cnt_time = 0
    pic_cnt = 0 #사진 번호
    while True:
        img = ImageGrab.grab()
        img.save("image_{}.png".format(pic_cnt))
        time.sleep(period)
        cnt_time = cnt_time + period
        pic_cnt = pic_cnt + 1

        if cnt_time >= duration:
            break

screen_capture()
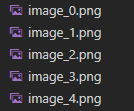
결과>>

코드 주석>>
period = 3 #주기값 입력
duration = 15 #촬영 시간
3초 간격으로 15초 간 캡쳐를 총 5번 진행합니다.
    while True:
        img = ImageGrab.grab()
        img.save("image_{}.png".format(pic_cnt))
        time.sleep(period)
        cnt_time = cnt_time + period
        pic_cnt = pic_cnt + 1

        if cnt_time >= duration:
            break
while문을 돌리면서 if문 조건을 만족할 경우 while 문을 빠져 나오게 만들었습니다. 이미지 파일은 pic_cnt 를 증가시키면서 하나씩 저장 합니다.
[Python] 컴퓨터 화면 설정한 시간 별로 캡쳐하기 #3
이번에는 일반적으로 다른 프로그램과 캡쳐 프로그램을 같이 돌리는 경우 들이 있습니다. 예를 들어 캡쳐 프로그램을 tkinter와 같은 GUI에서 동작 시킬 경우 GUI가 멈춰 버리는 경우가 있습니다.
이러한 현상을 막기 위해 Threading을 사용합니다.
예제 코드>>
from PIL import ImageGrab
import time
import threading

period = 3 #주기값 입력
duration = 15 #촬영 시간

def screen_capture():
    cnt_time = 0
    pic_cnt = 0 #사진 번호
    while True:
        img = ImageGrab.grab()
        img.save("image_{}.png".format(pic_cnt))
        time.sleep(period)
        cnt_time = cnt_time + period
        pic_cnt = pic_cnt + 1

        if cnt_time >= duration:
            break

t0 = threading.Thread(target=screen_capture, name='t0')
t0.start()

while True:
    print("Hello")
    time.sleep(3)
결과>>

Hello
Hello
Hello
Hello
Hello
Hello
Hello
코드 주석>>
t0 = threading.Thread(target=screen_capture, name='t0')
t0.start()

while True:
    print("Hello")
    time.sleep(3)
t0이라는 쓰레드를 만들고 동작 시키고 메인 프로그램은 "Hello" 구문을 찍어 냅니다.
코드 다운로드>>
'파이썬(Python)' 카테고리의 다른 글
| [Python]복잡한 미분함수 파이썬으로 구하기(사인 Sine/Cosine, 로그 Log/ln) (0) | 2023.03.21 |
|---|---|
| [Python]GPS파일(nmea)에서 위도, 경도, 속도, 시간 정보 읽어서 csv에 저장하기(Latitude, Longitude, Speed, Time) (0) | 2022.11.10 |
| [Python] 피보나치(Fibonacci) 수열이란? 파이썬으로 구현하기 (0) | 2022.06.22 |
| [Python]텍스트를 음성으로 변조(변환)하기 (gTTS 모듈) (0) | 2022.05.10 |
| [Python]파이썬으로 PDF 자르기, 붙이기, 편집하기 (0) | 2022.04.02 |