회원 가입 페이지 만들기
이번예제의 목표는 flask와 mongodb를 연동해서 사용하는 것이다. 구성은 가입할수 있는 html 페이지를 만들고 가입 신청을 하면 mongodb에 저장하고 저장한 값을 print로 읽어 볼 것이다.
이번 예제에서 구현할 기능은 아래와 같다.
- html에서 email과 password 입력하는 form 테이블 만들기
- 값을 입력하지 않으면 flash 로 경고창 띄우기
- 데이터베이스(mongodb)에 저장하고 읽기
비록 간단한 예제이지만 구현하기 위해 flask 기본, flash 사용방법, mongodb 설치가 필요하다. 각 각에 대한 설명은 아래 링크를 보면 간단한 예제와 함께 설명 되어 있으니 참조하길 바란다.
flask 기본 : https://scribblinganything.tistory.com/45
flash 사용방법 : https://scribblinganything.tistory.com/175
mongodb 설치 : https://scribblinganything.tistory.com/195
예제 실습하기

구성은 그림1과 같다. templates 폴더 안에 login.html 파일이 있고 밖에는 flask_mdb.py 파일이 있다.
코드 - login.html>>
{% with messages = get_flashed_messages() %}
    {% if messages %}
        <script>
            alert("{{messages[-1]}}")
        </script>
    {% endif %}
{% endwith %}

<!DOCTYPE html>
<html lang="en">
<head>
    <meta charset="UTF-8">
    <meta http-equiv="X-UA-Compatible" content="IE=edge">
    <meta name="viewport" content="width=device-width, initial-scale=1.0">
    <title>Document1</title>
</head>
<body>
    <form action="/login" method="post">
        <p>EMAIL : <input type="text" name="email" /></p>
        <p>PW : <input type="password" name="pw" /></p>
        <p><input type="submit" value="submit" /></p>
    </form>
</body>
</html>
flash를 사용하기 위해 jinja2 문법을 사용해야 한다. 위에 {% %} 로 묶인 부분이 jinja2 문법이다. jinja2의 사용법은 해당 링크를 참조하길 바란다. (https://scribblinganything.tistory.com/168)
py 파일에서 보낸 메세지가 있다면 alert에서 해당 메세지를 띄운다.
코드 - flask_mdb.py>>
from flask import *
from flask_pymongo import PyMongo
#########################################################
# Flask 선언, mongodb와 연결
web_bulletin = Flask(__name__, template_folder="templates")
web_bulletin.config["MONGO_URI"] = "mongodb://localhost:27017/bulletin"
web_bulletin.config['SECRET_KEY'] = 'psswrd'
mongo = PyMongo(web_bulletin)
#########################################################
web_bulletin.secret_key = '사용자지정비밀번호'
@web_bulletin.route("/login", methods=["GET", "POST"])
def bulletin_write():
if request.method == "POST":
email = request.form.get("email", type=str)
pw = request.form.get("pw", type=str)
if email == "":
flash("Please Input EMAIL")
return render_template("login.html")
elif pw == "":
flash("Please Input PW")
return render_template("login.html")
signup = mongo.db.signup
check_cnt = signup.find({"email": email}).count()
if check_cnt > 0:
flash("It is a registered email")
return render_template("login.html")
to_db = {
"email": email,
"pw": pw,
}
to_db_signup = signup.insert_one(to_db)
last_signup = signup.find().sort("_id", -1).limit(5)
for _ in last_signup:
print(_)
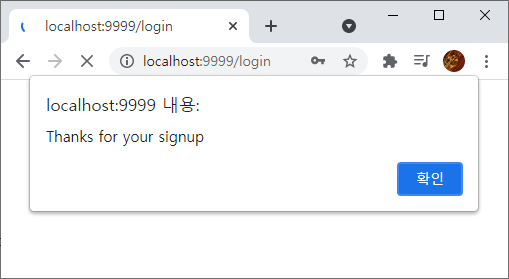
flash("Thanks for your signup")
return render_template("login.html")
else:
return render_template("login.html")
if __name__ == "__main__":
web_bulletin.run(host='0.0.0.0', debug=True, port=9999)mongodb 를 flask와 연결하기 위해 코드처럼 설정해야 한다. 그리고 pymongo 라이브러리를 사용해서 flask에서 간단하게 mongodb의 데이터 베이스 값을 쉽게 읽고 쓸 수 있다.
결과 화면 - email 값을 입력 안했을 때>>

결과 화면 - 입력하고 robo에서 db값 확인하기>>


위 그림은 robo에서 mongodb 값을 읽은 것이다.
아래는 visual studio에서 print 문으로 찍은 값이다.
{'_id': ObjectId('60c95f83eba8b359121a310d'), 'email': 'aaaa@aaaa.com', 'pw': '1234'}
'데이터베이스(db)' 카테고리의 다른 글
| [Python] Pymongo 데이터베이스 생성, 삭제, 변경, 정렬 (Collection, Database) (0) | 2021.12.01 |
|---|---|
| 파이썬에서 DB에 비밀번호 암호화(hash)해서 저장하기(flask,mongodb) (0) | 2021.06.19 |
| [Python] MongoDB 설치, 파이썬과 연동(robomongo/robo 3t) (0) | 2021.06.16 |
| [Python] MySql 생성, 삭제, 검색 (pymysql, create, delete, search 예제 포함) (0) | 2021.06.10 |
| mysql 아이디, 비번 분실 시 부분 재설치로 아이디 비밀번호 다시 만들기 - 윈도우 환경 (4) | 2021.06.04 |